It is often said that necessity is the mother of invention. I wouldn’t call my desire for a lemon cake on this snowy Valentine’s Day a true necessity…. but there are times in life when we all just need a piece of cake!
One of my recent obsessions has been mug cakes. My first inspirations were from Chocolate Covered Katie’s blog: http://chocolatecoveredkatie.com/
She has a lot of great ideas for single serve desserts, but to be honest, they are too small for me. I have been making my own mug cakes that are a bit more filling, although I still wouldn’t share. Unable to venture out in the snow to get ingredients for my usual coffee cake in a mug, I discovered a bottle of lemon extract and a bit of shredded coconut leftover from making granola in my pantry. Thus, the lemon coconut mug cake was born. I tried with several different flour blends, and even once with protein powder until I nailed what I think is the perfect blend.
Did I mention that this recipe takes less than 5 minutes, is vegan, gluten free, and incredibly easy?
Ingredients:
2 tbsp rice flour
4 tbsp almond flour
1/2 tsp baking powder
1/8 tsp salt
1 tsp sugar, stevia or xylitol
3 tbsp So Delicious Vanilla Coconut milk
1 tbsp. + 1 tsp oil (you can use any, I used a neutral tasting olive/ vegetable oil blend)
1/2 tsp. lemon extract
2 tsp. Shredded unsweetened coconut
1 tsp. Lemon Zest (optional)
Directions:
Grease the inside of a mug or ramekin. Combine all dry ingredients directly inside the mug or ramekin. Make sure you mix very well. And wet ingredients and mix to combine. Add about half of the lemon zest and coconut to the mix. Cook for about 1 minute in the microwave. Sprinkle with remaining lemon zest and coconut if desired!
This recipe is part of the The Fast and Fresh “Dairy-Free Time Trials” Recipe Contest!
January has been a good month for me so far. Along with sticking to a spending fast, I have also set a goal to return to a consistent meditation practice, as well as return to running (albeit in a different and way) than I have in the past.
Meditation is a practice that I have dabbled with for about two years now. In the past I have been consistent for a little while, then life would get busy—and I wouldn’t prioritize it any more. I know that I am a calmer, more grounded person when meditation is a regular part of my routine. I know that I am a sweeter wife and a more effective therapist when I simply start my day with deep breathing.
I have tried a few different practices, but finally two weeks ago—I found the key that makes meditation work for me. I had the opportunity to attend a one day workshop on mindfulness, where I was introduced to the “gatha.”
In case you don’t know, gathas are short poems or verses that we can recite, regardless of where we are, to help us return to the present moment and to dwell in mindfulness. I finally found one that worked for me, and using this gatha as I meditate has helped me be consistent in my meditation for 10 days—the longest I have sustained a practice in quite some time.
The gatha I use is this:
Breathing in, I calm my body
Breathing out, I smile
Dwelling in the present moment,
I know this is a wonderful moment!
At the training we learned to practice like this, as you breathe say the words in parentheses silently:
Inhale (in)
Exhale (calm)
Inhale (out)
Exhale (smile)
Inhale (present)
Exhale (wonderful)
There are of course many variations of this, explained in Thich Nhat Hanh’s lovely little book, Present Moment, Wonderful Moment. I have found this little volume invaluable as I learn to practice mindfulness in my daily life. I am also learning that having a seated meditation practice is key for creating mindfulness in life. The other crucial piece has been choosing to meditate first thing in the morning, (rather than playing on my phone or on the internet, my usual morning routine!) Deepak Chopra calls this the “RPM” method—rise, pee, mediate. Trust me, it works. Some days I rise, pee, mediate, mindfully drink a cup of coffee, than meditate. But I am sitting, and practicing, and I can feel the difference.
One of the unexpected ways that my mindfulness helped me, was this past Saturday when I ran a 10 mile trail race—the first race I had done in nearly 3 years. It was a very cold, windy morning and I was wondering why I even signed up when we were waiting to start. As we started running, navigating single track trails, and alone with each other and the breath, I found myself reciting the gatha. And each step that I took was wonderful. I realized I had to focus as I ran in much the same way that I do when meditating. Each step, each breath, was something new. A new root, a new rock, a fresh patch of mud met me at my every step. I finished strongly (although I am not sure of my place or time—practicing some non-attachment with that!), and most importantly felt present throughout the entire run. I am eager to sign up for another trail race and practice my new favorite form of moving meditation.
One final piece to share—on my spending fast I challenged myself to make my own chocolate instead of buying the expensive “Endangered Species” chocolate bars I usually favor. I figured I could save money and probably make it healthier too. Enter the world’s easiest and healthiest homemade chocolate!
Dark Pecan Chocolate Bars
Ingredients:
½ cup cocoa (unsweetened)
½ cup coconut oil
1/3 cup coconut nectar
1 cup chopped pecans
Directions
In a small pan, over medium heat, heat cocoa and coconut oil. Once combined, stir in coconut nectar.
Once combined remove from heat and stir pecans in the mixture.
Line an 8 x 8 pan with parchment paper, pour mixture into the pan, and spread with a spatula.
Place entire pan in freezer, and let harden for at least one hour.
Remove, slice and enjoy!
I recommend storing these in the freezer if possible, I had to store mine in the back so I wouldn’t eat them all at once. You could easily sub 1 cup of any chopped nuts you would like, or add dried fruit, coconut, etc.
Happy January friends. Enjoy deep breaths, time outside, and plenty of chocolate until we meet again!
When I first became vegan, I of course already had celiac disease– and for a long time assumed that pancakes were something of an off-limits food for me. Obviously, the pancakes I had known were filled with flour, sugar, usually eggs– all ingredients I tried to avoid. Plus, they always made me crash mid-morning or more likely 10 minutes later…..Pancakes the way I knew them growing up were the type of food that just made me feel hungrier after I ate them.
Recently I have run across some great pancake recipes here: http://www.rickiheller.com/ (Sugar-free! grain-free! vegan!)
Her recipes inspired me to re-create my own version of a truly breakfast-worth pancake— and these were super easy to boot. My pictures aren’t so pretty yet, but I assure you this recipe is amazing. 🙂
My husband and I get a produce box once a week in the months of April through November. We get a lot of zucchini, squash and blueberries at this time of year, and I was looking for something different to do with all that zucchini– so I re-invented a favorite blueberry muffin recipe. Mine is vegan, high fiber, gluten free, has no added sugars. And delicious.
wet ingredients
1/2 cup applesauce, unsweetened
2 tbsp flaxseed meal mixed with 4 tbsp water
1 medium zucchini grated or shredded in a food processor
2 medium sized very ripe bananas, smashed
1 tsp vanilla extract
1 cup fresh blueberries
dry ingredients
2 cups buckwheat flour (or just use a basic gluten free flour like Bob’s Red Mill)
1 cup brown rice flour
1/2 cup potato starch
1 tsp xanthan gum
1 tsp baking soda
1 1/2 tsp baking powder
1 tsp sea salt
Preheat oven to 350 °F.
In large bowl, combine together all wet ingredients and stir well.
In separate bowl, whisk together all the dry ingredients until combined. Add dry ingredients to wet until you get a thick batter.
Drop about 1/4 cup batter into 24 greased muffins tins, or use paper liners if you prefer.
Bake 25 minutes, or until tops are very lightly golden brown. Yum!
This summer healthy and yummy casserole satisfies the craving for a comfort food casserole with no cholesterol, lots of veggies, and best of all delicious! Makes about 9-10 servings.
Ingredients:
3 cups grated Zucchini (about 2 medium)
1 ½ cups grated carrot (1 large peeled carrot)
3/4 cup Nasoya Nayoniase (or your favorite vegan mayo!)
2 cups cooked black beans
2 cups Daiya Cheese (or your favorite vegan cheese!)
12 ounce jar of salsa (I used Trader Joe’s Tomatillo Roasted Yellow Chili Salsa)
Preheat oven to 400. Line a 9 x 13 pan with foil and spray with cooking spray. Combine grated zucchini, carrot and vegan mayo in large mixing bowl. Spread into the tray and press down with the spatula. Cook for 25 minutes (just the veggies) until they look brown on top.
Next spread black beans, salsa, and finally cheese onto the cooked veggies and bake again for 35-40 minutes until the top is bubbly.
Allow to cool 10 minutes before serving. Seriously good!
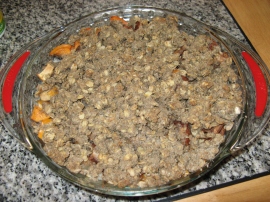
One of my favorite winter time desserts is a basic fruit crisp. My mom made this a lot growing up—but her original recipe calls for wheat flour and wheat germ, as well as butter and honey. The recipe below is adapted to be vegan and gluten free, using buckwheat and brown rice flours along with maple syrup. I also used a mix of persimmons and pears, but these can be replaced with apples, peaches, or any other similar fruit. Not to toot my own horn—but this new version is delicious. Buckwheat flour and maple syrup are a delightful and healthy combination.
This is a great way to use apples that have a few bad spots or pears that are getting soft without resorting to composting. Serve with vegan coconut milk whipped cream for a special treat or with almond milk for a twist on your traditional breakfast.
Ingredients:
3 pears, any kind sliced
2-3 Fuyu persimmons, sliced
1 cup gluten free rolled oats
½ cup buckwheat flour
½ cup brown rice flour
½ cup earth balance (or similar vegan spread) softened
½ cup maple syrup
2 tsp. cinaamon
Directions:
Put sliced pears and persimmons in a greased 9” x 13” pan. Sprinkle with water. Combine the rest of the ingredients. Bake at 350 degrees for 30 to 40 minutes, or until the fruit is soft. Serve warm or cold, plain or with a topping.
Iron Woman Cookies OR Molasses, Oatmeal Pumpkin Seed Powerhouses
(Wheat and Gluten free, Vegan, No Sugar)
These impromptu cookies were inspired by a recent phone conversation with my sister Helen. I asked her if she would be okay with being meat free while she visited my husband and I in Durham.
She hesitated, mostly out of concern that she wasn’t getting enough iron on her diet. But many foods that are the richest sources of iron are actually plant based. Molasses, pumpkin seeds and oatmeal are some of the best sources of iron. One serving of pumpkin seeds has almost 25% of the RDV of iron, 1 tbsp, of molasses has 5%, oats vary with 5-25% of RDV for iron. In contrast, about 3 ounces of roast beef has less than 10% of your RDV for iron. Easy math!
The vegetarian working group has a nice table for comparing vegan and non-vegan iron sources in an easy to read format. See below:
On to the cookies, the more important part of this post. A quick nutritional analysis has these cookies clocking in with 15% of the RDV for iron and less than 100 calories. Two cookies would actually be a tasty snack that would provide 1/3 of your daily dose of iron!! Easy, yummy and hubby approved. There won’t be any left by the time my sister arrives for Thanksgiving, so we’ll have to make another batch for sure.
Ingredients:
Dry:
1 cup gluten free rolled oats (I like Trader Joe’s brand)
1/3 cup oat flour
¼ tsp salt
1 tsp baking powder
½ tsp cinnamon
½ tsp pumpkin pie spice
Wet:
1 tsp finely ground ginger
1 tsp vanilla extract
½ mashed banana
½ cup unsweetened applesauce
2 tbs coconut oil
4 tbs blackstrap molasses
¼ cup pumpkin seeds
Directions:
Preheat oven to 375 degrees.
Combine dry ingredients, stir to mix evenly.
Combine wet ingredients, use whisk or hand mixer to combine.
Slowly add dry to wet ingredients and blend until well mixed.
Line a cookie sheet with parchment paper and bake for 10-12 minutes. Makes 12-15 cookies.
Woke up SUPER early this morning (like usual) except today my 4:40 am wake up was, oops, 3:40 am. Not one to turn back over and fall asleep I spent the morning tackling some recipes that take a little more time and effort than something I would create on a typical weekend. With that I bring you:
My mother in law has a persimmon tree, among other wonderful fruit trees in her back yard, and has been giving my husband and I pounds and pounds of persimmons. I eat them like apples when they’re ripe…but we have about 60 persimmons to do something with. I have recently re-ignited my relationship with my slow cooker, and found a simple way to make a spread from our abundance of ripe persimmons. And it makes the whole house smell delicious!
Makes 4 half-pint jars, depending on size of persimmons
Ingredients:
30 ripe Fuyu persimmons, coarsely chopped
1 lemon, juiced
2 tsp. Cinnamon
½ tsp fresh ground cloves
4 half pint canning jars with lids and rings
Directions
Place persimmons into a slow cooker; amount should fill a 6-quart cooker nearly to the top. Drizzle the lemon juice over the persimmons, cover the cooker, and cook on High for about 2 hours. Mash the persimmons in the cooker with a potato masher. Stir in the cinnamon, cloves, and agave syrup, set the cooker to Low, and cook uncovered 6 hours or overnight. Stir several times if possible, to prevent burning during the long cooking period.
After they have cooked down, transfer the persimmon mixture to a blender, filling the pitcher no more than halfway full. Hold down the lid of the blender with a folded kitchen towel, and carefully start the blender, using a few quick pulses to get the persimmon butter moving before leaving it on to puree. Puree in batches until smooth. If you have an immersion blender, you can puree the persimmon butter right in the cooker if desired.
Sterilize the jars and lids in boiling water for at least 5 minutes. Pack the persimmon butter into the hot, sterilized jars, filling the jars to within 1/4 inch of the top. Run a knife or a thin spatula around the insides of the jars after they have been filled to remove any air bubbles. Wipe the rims of the jars with a moist paper towel to remove any food residue. Top with lids, and screw on rings. Allow the jars to cool to room temperature, then refrigerate the jars.
I am hoping to have enough to use persimmon butter for Christmas presents this year.
The first two times I tried to make it, the bread was very dry and I wasn’t super pleased with the result. This time I added chia gel, as one of the comments suggested, and decreased the amount of flour. Also, I tried the “no-knead” style to preserve the natural sponginess. I find this bread works best cooked on a “pizza stone” rather than in a bread pan. I still haven’t reached perfection with my sourdough bread, but fermented foods are both an art AND a science, and there are many more loaves to bake. Happy Daylight Saving!
Burgers, Slaw and Cornbread have all gone vegan in this week’s recipe post. Not to mention gluten free, sugar free, and of course delicious.
Recipe # 1: Black Bean Burgers
I ran across this basic recipe for homemade black bean burgers at Whole Foods last week, and I am hooked—the recipe reminds of the Vegan Magic Loaf, where you can substitute different beans and grains to make a different vegan burger each time. The recipe that follows is from the Engine-2 Challenge (Plant Based Diet).
1 cup starch (uncooked oats, cooked quinoa, cooked brown rice)
1 cup diced vegetables (carrot, onion, mushroom, tomato paste)
½ tsp spices (garlic, basil, oregano, thyme, cumin)
¼-1/2 cup liquid (veggie broth, liquid from beans, water, or non dairy milk)
2 tbs ground flax combined with 3 tbs of warm water
Method:
Pre heat oven to 350 degrees
Put cooked beans in a big mixing bowl, mash with a fork—or if you have one—try an immersion blender.
Add the starch and mix really well.
Add vegetables, cooked or raw. (I prefer cooked, but this is more time consuming)
Add spices, liquid, flax and mix well.
Form patties, and place them onto a parchment lined cookie sheet. You can make 4-5 large burgers, or 8- 10 smaller burgers.
Bake for 20-30 minutes, flipping halfway through. Aim for the lower end of the time range if you made the smaller version, the longer end if you made the bigger burger.
We served ours with Cool Cabbage Slaw (Remix), you can serve like a regular burger, or for a twist—make them in a muffin tin and you can have bean muffins!
Recipe #2: Cool Cabbage Slaw (Remix)
We were lucky enough to get an enormous local cabbage in our Produce Box last week, and I immediately thought of one of my favorite recipes from growing up, a Cool Cabbage Slaw, which is a tangier and sweeter twist on coleslaw. My Mom’s original version calls for white sugar and white vinegar—both of which are very acidic, and not so good for the body. My version amps up the veggies, and subs refined sugar for lemon zest, and instead of canola oil and vinegar, uses apple cider and rice vinegars blended with sesame oil. Yum!
Ingredients:
1 small green cabbage (about 6 cups) shredded
3 medium carrots, chopped
3 ribs celery, chopped
1 large green pepper, chopped
1 large red pepper, chopped
3 small cucumbers, chopped
1 large bunch radishes, chopped
1 large onion, chopped
Dressing:
½ cup rice vinegar
½ cup apple cider vinegar
½ cup lemon juice
½ cup sesame oil
½ tsp. pepper
Method:
Wash all vegetables, and either use a food processor or a large amount of patience to chop all vegetables and combine in a large bowl.
Combine dressing ingredients in a mason jar with a lid and shake.
Pour dressing over the vegetables, mix well and chill several hours before serving.
If you chop the vegetables in a food processor, you will get a finer product that makes a great topping for black bean burgers, if you chop by hand, it will be more of a salad. Either way is tasty!
Recipe #3: Southern Style Cornbread
I have been really into cornbread lately. I have been experimenting with a number of different recipes, trying to find that perfect gluten-free, sugar-free, vegan concoction that is slightly crumbly,–still a bit cake-like—and reminiscent of the cornbread I grew up with. Thanks To Chocolate Covered Katie and Healthy, Happy Life for some great inspiration— about ½ a dozen pans of cornbread later, I have found a winner!
Ingredients:
2 cups whole grain fine or medium corn meal
4 Tbsp coconut oil
1/4 cup maple syrup
4 tsp baking powder
1 tsp salt
1/2 cup almond milk
1 tsp vanilla extract
1 Tbsp vinegar
1 tsp cayenne
1 cup Okra: pan-toasted okra
OR
1 can corn, drained
Method:
Preheat oven to 375 degrees.
In large mixing bowl, add flour, baking powder, salt and cayenne.
Stir in remaining liquid ingredients until batter is smooth and creamy.
Fold in okra or corn.
Pour into 8 inch circle baking pan.
Bake at 375 degrees for 40 minutes or until the edges crisp up.
What I really love about this cornbread is the combination of spicy and sweet, plus the added veggies help keep it moist. The only rule for eating this cornbread is that you have to butter (or earth balance!) it while it’s hot!
In response to an outpouring of abundance in my own life– and being asked on more than one occasion by my friends, co-workers and fellow yogis to share the recipes I develop in my kitchen– I have finally delved into the ever-growing world of blogging. So here goes!
The recipes you will find here are all vegan and gluten free, a way of eating and living about which I am very passionate. My endeavor is to share with my readers the simple abundance of a plant-based lifestyle, through simple whole foods. I also hope to share recipes that are easy to adapt and take as little toll as possible on the environment.
With it being back to school time let’s start with the recipe I created today, a homemade vegan granola bar. My husband Ray is a middle school history teacher, and he is a big fan of packing fruits and granola bars to get him through the school day. Bananas are his favorite, and he likes to call them “mother nature’s fast food.” He is also a big granola bar fan, especially the peanut butter and oat variety from Trader Joe’s.
Recently we were discussing all of the waste created when we rely heavily on per-packaged foods– and came to the realization that even his favorite bars require a lot of packaging. Unlike many foods we choose, we cannot compost or recycle granola bar wrappers, and since Ray averages 2 boxes of Trader Joe’s granola bars per week, the waste really adds up!
Plus, most of TJ’s bars are not gluten-free, which means I can’t enjoy them with him. While I have found many granola bar recipes on the internet, few are vegan (lots of honey or eggs to bind them) and have lots of sugar and/ or gluten. So the recipe that follows is vegan, gluten-free and uses only natural sweeteners. It is a bit crumbly, but stay tuned as I develop this recipe and make some better products! Enjoy and let me know what you think.
Oatmeal Raisin Vegan Granola Bars
Ingredients:
• 2 cups rolled oats gluten-free
• 1 tsp. cinnamon
• ½ cup all-purpose flour + ½ cup sorghum flour
• ¾ cup raisins
• ¾ tsp. salt
• ½ cup maple syrup
• 2 tbsp. Flax seeds + 6 tbsp. Water
• ¼ cup oil
• 2 tsp. vanilla extract
• ½ cup applesauce
Directions:
Preheat the oven to 350 degrees. Grease a 9 x 13 inch baking pan. In a large bowl, ms all dry ingredients. Make a hole in the center, and pour in maple syrup, oil, vanilla and applesauce. In a small separate bowl, whisk flax seeds and water. (This is your “Eggs”). Let the flax and water mixture sit for a minute before combining with dry and wet ingredients. Gently mix with a wooden spoon, or your hands if you don’t mind getting a bit messy! Bake for 30 minutes, or until browned at the edges. Cool for a few minutes before cutting. If you don’t let them cool they will crumble! (I speak from experience….)
They will keep in an airtight container for about a week, and are easy to pack in reusable containers. Happy Snacking!